Global high-mix volume high-speed PCBA manufacturer
9:00 -18:00, Mon. - Fri. (GMT+8)
9:00 -12:00, Sat. (GMT+8)
(Except Chinese public holidays)
Global high-mix volume high-speed PCBA manufacturer
9:00 -18:00, Mon. - Fri. (GMT+8)
9:00 -12:00, Sat. (GMT+8)
(Except Chinese public holidays)
HomePage > Blog > Knowledge Base > How to Solder Electronics: Complete Guide for Beginners
In electronic production, repair and maker projects, how to solder electronic components is a core skill that every electronics enthusiast should master. Whether you are planning to repair a damaged circuit, assemble an Arduino prototype board, or build your own smart device, soldering is the first step into the electronic world.
Many beginners feel unfamiliar with - or even afraid of the process of melting metals to connect circuits. But in fact, soldering electronic components is not mysterious. As long as you understand the basic principles, prepare the right tools, and master some key skills, you can easily get started.
This soldering tutorial compiles the essence of multiple authoritative sources and is specially designed for beginners in soldering. You will learn:
• The basic principles of soldering and common types
• The essential tools and materials
• A clear, step-by-step soldering process
• Practical soldering tips for new users
• Key advice on how to avoid common mistakes
If you are looking for a clear, easy-to-understand and comprehensive guide on how to solder, this article is the perfect place to begin.
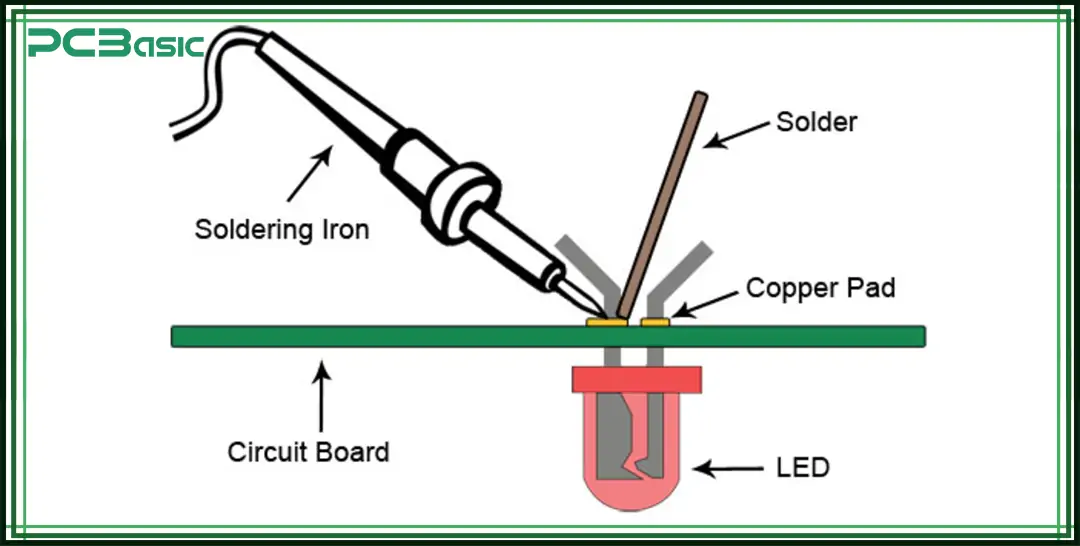
Soldering is a method of connecting two metal parts together by heating solder soldering metal. In electronic products, soldering is not only for fixing components, but more importantly for establishing a stable, reliable electrical connection. This is called electronic soldering.
Unlike traditional soldering, electronic soldering electronic soldering does not melt the components themselves. Instead, it heats the solder to a molten state and allows it to flow into the contact area. When it cools down, a solid and conductive solder joint will be formed.
A typical soldering process usually involves heating the solder joint with a soldering iron, along with the pins and pads of the components; Then send in the solder, allowing it to melt and flow into the gap; Finally, it cools naturally to form stable solder joints. During this process, it is very important to control the temperature and time well. Especially when cooling, it should not be moved; otherwise, cold solder joints are likely to occur. These solder joints look normal on the surface but have poor contact inside, which can easily lead to circuit failures.
Therefore, understanding and mastering the principles and methods of electronic soldering is the foundation for making good circuit connections and improving product reliability. Although this technology seems simple, it has high requirements for materials, temperature and operation methods, and is a very important part in electronic engineering.
Before learning how to solder electronics, it is very helpful to know the common soldering methods. Different soldering methods are suitable for various scenarios, ranging from manual operations to industrial automated production. Choosing the appropriate technology can enhance efficiency and reliability.
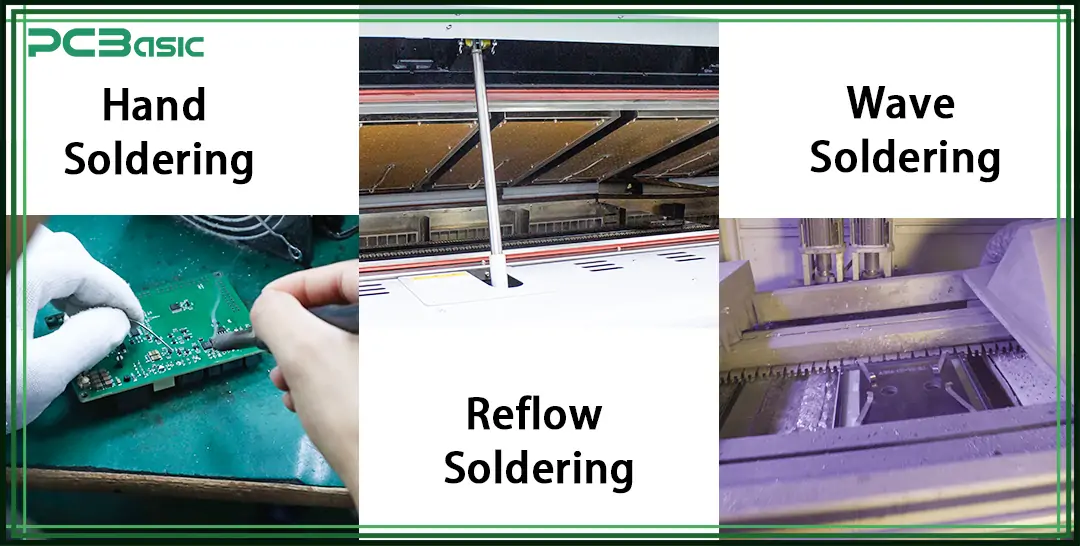
Hand Soldering
Hand soldering is the most common electronic soldering method. It involves manually heating and soldering components with a soldering iron. It is suitable for DIY projects, prototype development and daily maintenance, and is the preferred method for beginners to start soldering.
Reflow Soldering
Reflow soldering is often used for soldering SMT components. Solder paste is first applied to the pads on the circuit board, then components are placed, and the entire board is heated in a high-temperature oven until the solder reaches a molten state and forms the joints. This method is well-suited for automated, large-scale production.
Wave Soldering
Wave soldering is mainly used for large-scale soldering of through-hole components. The circuit board passes over a wave of molten solder, and the solder automatically covers the solder joints, quickly forming connections. This is suitable for assembly line production.
This soldering tutorial will focus on hand soldering, which is best for beginners.
If you want to learn how to solder electronics, the first step is to prepare the right tools. With the proper tools, soldering becomes easier, and learning is much more efficient.
Soldering Iron
This is the most important tool for soldering. It’s best to use a soldering iron with adjustable temperature, anti-static design, and replaceable tips. Learning how to use a soldering iron helps you control the heat better and avoid damaging components.
Soldering Metal
There are two main types of solder: leaded and lead-free. Leaded solder is easier for beginners, while lead-free solder is more environmentally friendly. Beginners should use rosin-core solder with a diameter between 0.5 and 1.0 mm.
Flux
Flux removes oxides and helps solder stick better. Many solder wires already contain flux, but having a flux pen on hand makes things even easier.
Tip Cleaner
A clean soldering tip makes soldering smoother. You can clean it using a brass wire sponge, wet sponge, or tip cleaner paste.
Third Hand or PCB Holder
Clamping the circuit board in place keeps your hands steady and improves accuracy. It’s a very useful tool for beginners.
Desoldering Tools
Made a mistake? No problem. Use a desoldering pump or desoldering braid to remove excess solder. It’s great for fixing or redoing solder joints.
Tip: Choosing the right tools makes learning easier. Good tools will help you quickly master soldering tips and the full soldering process.
Now, let’s walk through a standard soldering process step by step. This is a key part of learning how to solder electronics, and following these steps will help you build a strong foundation.
Step 1: Prepare Your Workspace
Before you start soldering, make sure your work area is clean, organized, and well-ventilated. Good lighting helps you see small components and solder joints clearly. Use a heat-resistant mat to protect your desk. For safety, wear safety glasses in case solder splashes.
Step 2: Tin the Soldering Iron Tip
Before using the soldering iron, heat it up to the right temperature. Once it’s hot, apply a thin layer of soldering metal to the tip. This is called “tinning.” It helps the tip transfer heat better and makes the soldering process smoother. It also protects the tip and extends its life.
Step 3: Secure the Component
Insert the component into the holes on the circuit board. Use a clamp or third-hand tool to hold the board steady. This prevents the component from moving while you solder. A stable setup is very important, especially for soldering beginners.
Step 4: Heat the Joint
Touch the tip of the soldering iron to both the pad and the component lead at the same time. Heat them for about one or two seconds until the metal is hot. Don’t just heat the solder or one side—both surfaces need to be hot to make a good joint.
Step 5: Apply the Solder
After the joint is hot, bring the soldering metal to the connection point—not to the soldering iron tip. The solder should melt naturally and flow into the joint. A good solder joint will look small, smooth, and cone-shaped. This is the key part of how to solder correctly.
Step 6: Remove and Let Cool
Once the solder flows into place, first remove the solder wire and then the soldering iron. Let the joint cool on its own. Don't blow on it or move the board. Any movement can cause a "cold joint," which may look fine but can cause a poor connection.
Step 7: Check and Trim
After cooling, use flush cutters to trim off any extra component leads. Look at the solder joint closely. It should be shiny, smooth, and clean with no cracks or sharp points. A good joint is strong and conducts electricity well—this means your electronic soldering was successful.
Until this step, you've just completed a full soldering process. This is a basic skill every electronics hobbyist should learn while mastering the soldering basics. Keep practicing, and you'll improve quickly!
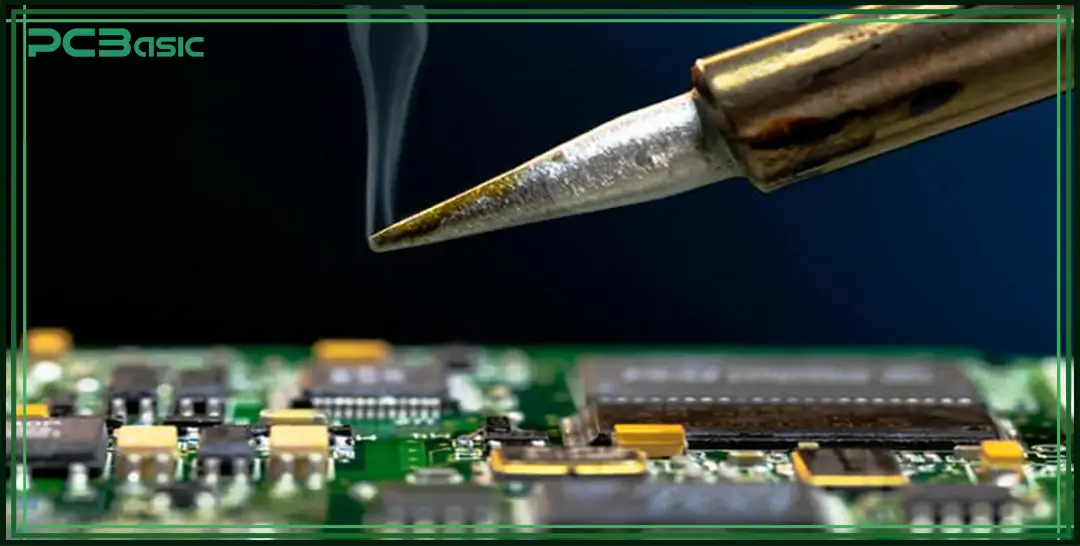
Whether you’re assembling a circuit or repairing wires, mastering a few simple soldering tips can make a big difference.
1. Clean the soldering iron tip after each joint. This helps maintain good heat transfer and makes the joint more stable.
2. Don’t use too much solder. Excess solder can cause bridging and short circuits.
3. Don’t blow on the joint after soldering. Let it cool naturally to avoid cold joints.
4. Choose the right soldering tip. A conical tip works well for small, detailed parts, while a chisel tip is better for larger pads.
5. Practice first. Try soldering on scrap boards or practice kits to build your skills.
6. When soldering two wires together, tin them separately first, then solder them together. This makes the connection stronger.
As you keep practicing these soldering techniques, your control and confidence will steadily improve. Learning how to solder electronics is like learning to draw—it takes practice, attention to detail, and patience.
 About PCBasic
Time is money in your projects – and PCBasic gets it. PCBasic is a PCB assembly company that delivers fast, flawless results every time. Our comprehensive PCB assembly services include expert engineering support at every step, ensuring top quality in every board. As a leading PCB assembly manufacturer, we provide a one-stop solution that streamlines your supply chain. Partner with our advanced PCB prototype factory for quick turnarounds and superior results you can trust.
While learning how to solder electronics, you may run into some common mistakes. Knowing these problems and how to avoid them is important for improving your soldering skills.
Cold Solder Joint
This is one of the most common issues. It happens when the joint is not heated enough, or the component moves during soldering. A cold solder joint looks dull and rough. It also has poor electrical contact and can cause circuit failure. To fix this, make sure the joint is fully heated and keep the component still while soldering.
Solder Bridge
Using too much solder can create a bridge between two nearby pads or pins. This causes a short circuit. To avoid solder bridges, use the right amount of solder and try a thinner soldering metal. If a bridge happens, remove it with a desoldering braid.
Overheating Damage
If the soldering iron stays too long on the part, it can overheat and damage the component. Usually, heating for one or two seconds is enough. Do not stay too long on one joint. If you need to re-solder, let it cool down first.
Dirty Solder Joint
If the pad or component lead is dirty with oil, oxidation, or dust, the solder won’t stick well. The joint may be weak or fail. Clean the pad or lead with alcohol before soldering to keep the surface clean.
Using the Wrong Solder
Do not use plumbing solder or solder with no flux. For electronic soldering, always use rosin-core soldering metal. It helps clean the joint and improves bonding.
These mistakes can affect solder quality and may cause the whole circuit to fail. Watch carefully, learn from each try, and you’ll keep improving your soldering process and make strong, reliable joints.
Learning how to solder electronics opens the door to a world of creativity and repair. Whether you are building a circuit board, fixing a broken device, or exploring DIY tech projects, soldering is a valuable skill to have. This beginner guide has helped you understand the soldering basics, the tools you need, the step-by-step process, and some useful soldering tips.
As you continue on your electronic soldering journey, remember this: practice is the key to getting better—don't be afraid to make mistakes. Using the right tools and methods will make the soldering process easier. Always put safety first—avoid burns, and don't breathe in too much smoke. If something goes wrong, don't give up. Every mistake is a chance to learn and improve. Keep going, and you'll soon be able to make strong, reliable solder joints and truly master this useful and fun skill.
Assembly Enquiry
Instant Quote
Phone contact

+86-755-27218592
In addition, we've prepared a Help Center. We recommend checking it before reaching out, as your question and its answer may already be clearly explained there.
Wechat Support

In addition, we've prepared a Help Center. We recommend checking it before reaching out, as your question and its answer may already be clearly explained there.
WhatsApp Support

In addition, we've prepared a Help Center. We recommend checking it before reaching out, as your question and its answer may already be clearly explained there.
