Global high-mix volume high-speed PCBA manufacturer
9:00 -18:00, Mon. - Fri. (GMT+8)
9:00 -12:00, Sat. (GMT+8)
(Except Chinese public holidays)
Global high-mix volume high-speed PCBA manufacturer
9:00 -18:00, Mon. - Fri. (GMT+8)
9:00 -12:00, Sat. (GMT+8)
(Except Chinese public holidays)
HomePage > Blog > Knowledge Base > Custom Keyboard PCB Guide: Design and Build Your Own Mechanical Keyboard
Mechanical keyboards are no longer just about buying finished products nowadays. Many enthusiasts began to use the custom keyboard PCB to design and manufacture keyboards by themselves. They can choose different layouts, switches and firmware according to their own needs. Whether you are a novice or an engineer, making a DIY keyboard enables you to control its feel, functions and appearance.
This article will teach you step by step how to design and manufacture a custom keyboard PCB. The content includes how to select the layout, do the keyboard PCB design, prepare the required mechanical keyboard components, and finally complete the assembly. Whether you want to make a 40% keyboard PCB or a full-size keyboard PCB, everything you need is here.

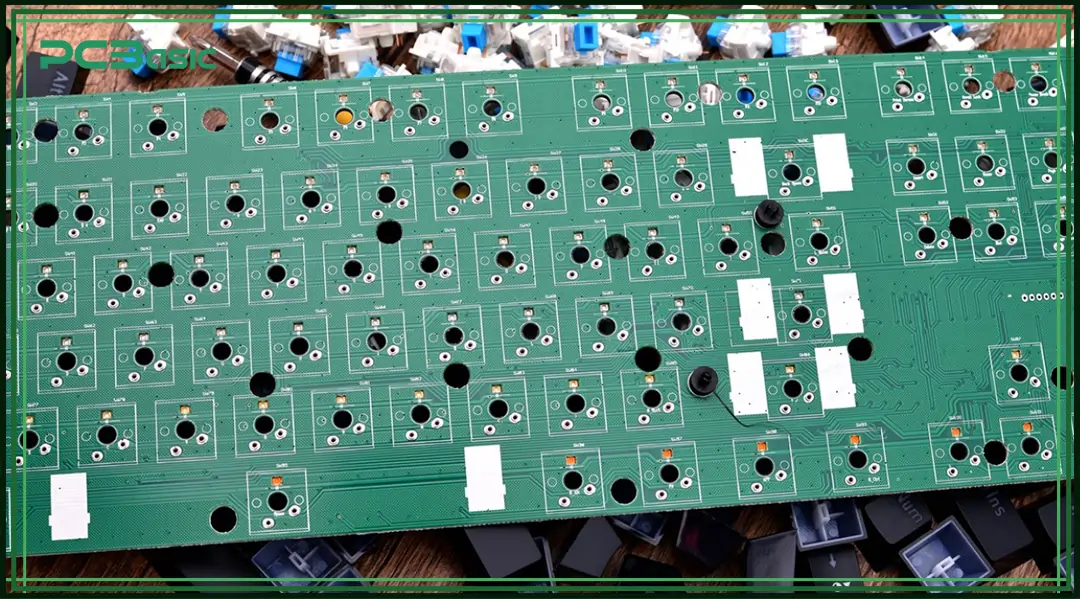
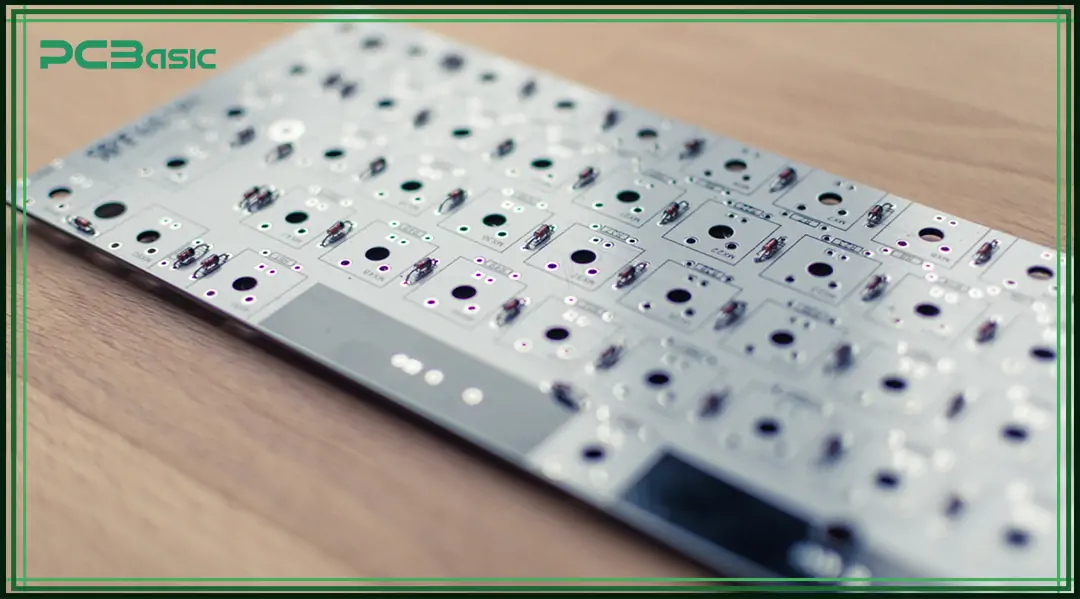
The custom keyboard PCB is the most crucial part of a mechanical keyboard. It is a keyboard PCB specially designed for a particular key layout, used for mounting the switches and connecting the microcontroller. The switch pads, circuit traces, and firmware interfaces are pre-arranged on the PCB. Some designs also reserve lines for LED backlighting or bottom lighting effects.
Unlike the generic PCBs used in mass-produced keyboards, custom keyboard PCBs are designed for users with specific needs. You can choose the type of switch, key layout, the expansion of functions according to your preferences, and even customize the firmware logic. Whether it's a 40% keyboard PCB that pursues ultimate portability or a full-size keyboard PCB that requires complete functional areas, the core that ultimately determines the performance and experience of the keyboard lies in this PCB.
Common mechanical keyboard PCBs support hot-swappable or soldered switch mounting, allowing users to replace the switches. It usually supports open-source firmware like QMK or VIA and can achieve fully programmable keymaps and functional layers. The control unit can be an onboard microcontroller or an external independent module. Meanwhile, many keyboard PCB designs also integrate built-in lighting control, facilitating the realization of personalized appearances.
Designing and using a custom keyboard PCB is the core link in the entire DIY process of mechanical keyboards. It not only determines the functional range of the keyboard but also provides a high degree of freedom, allowing users to build a keyboard that fully meets their needs from scratch.

Understanding the components of a mechanical keyboard is an important step before the keyboard PCB design. A standard DIY keyboard is usually composed of the following key mechanical keyboard components, each of which plays an irreplaceable role:
• Switches: Switches are the core components that determine the feel of the keys. Common types include linear, tactile, and clicky switches, which correspond to different actuation feedback respectively. Switches can be soldered onto the keyboard PCB or installed via hot-swappable sockets for easy replacement.
• Stabilizers: Stabilizers are used for large keys, such as the space bar, Enter, and Shift, to prevent left and right swaying when pressed and maintain a consistent feel. They are usually installed together with switches between the keyboard PCB and the plate.
• Keycaps: Keycaps are plastic enclosures installed above the switches and are the parts that users directly contact. It determines the appearance of the keyboard, the feel and the sound when tapping. Common materials include ABS and PBT.
• Case: The case is the structural framework of the entire keyboard, responsible for accommodating all internal components. The case material can be plastic, aluminum or other composite materials. Different materials will affect the weight, stability and sound performance of the keyboard.
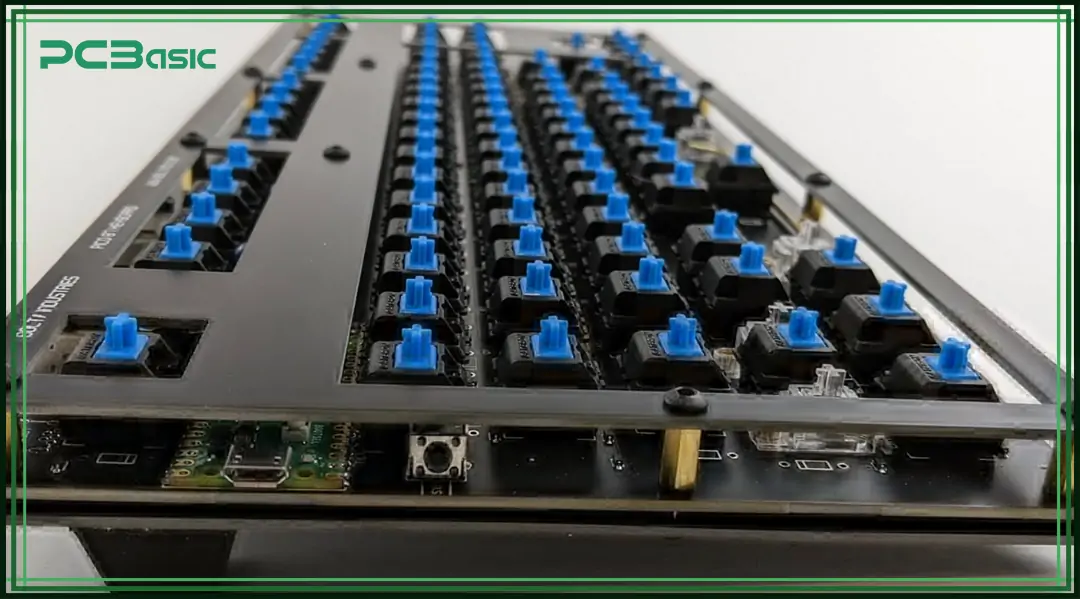
• Plate: The plate is located between the switches and the keyboard PCB and is used to fix the position of the switches and enhance the overall structural strength of the keyboard. It will also have a direct impact on the typing feedback and sound.
• Microcontroller: The microcontroller is the brain of the keyboard. Common models include ATmega32U4. It is responsible for reading key input, controlling LED lighting effects, executing firmware logic, and transmitting data to the computer.
All the above components need to be correctly mounted and connected to the custom keyboard PCB. They work together to enable your DIY keyboard to function properly and offer an excellent user experience.
When designing a DIY mechanical keyboard, choosing the appropriate keyboard layout is a very crucial step. The layout will directly affect how many keys your keyboard has, the size of the casing and the experience during actual use. Different layouts are suitable for different usage scenarios, so the choice should be made based on personal needs.
40% Keyboard PCB
The 40% keyboard PCB has the smallest layout, with only 40 keys. It removes the function row, direction keys and number pad, making it very compact and suitable for users who pursue ultimate portability or a minimalist keyboard design.
60% Keyboard PCB
The 60% keyboard PCB is a commonly used layout by programmers and gamers. It retains the primary key area and removes the function key row and the numeric keypad. Although there are fewer keys, complete input requirements can be met by setting multiple layers of function keys. It is compact in size and flexible to use.
65% Keyboard PCB
The 65% keyboard PCB has added dedicated arrow keys and some navigation keys on the basis of the 60%, making its functions more complete. It retains a compact design while enhancing practicality, achieving an ideal balance between size and functionality. It is suitable for users who wish to customize functions but do not want to use a too-large keyboard.
75% Keyboard PCB
The 75% of the keyboard PCBs retain the function row and arrow keys but compress the overall layout to be more compact. It is suitable for users whose desktop space is limited but still needs most of the standard key functions.
Full-Size Keyboard PCB
The full-size keyboard PCB offers complete key configuration, including a function row, navigation areas, and an independent numeric keypad, making it an ideal choice for traditional office work, data input, and table processing tasks.
Each layout requires a specially designed custom keyboard PCB to ensure the correct arrangement of the switch positions and firmware mapping. Choosing the right layout is the foundation of building a functional, efficient, and personalized DlY keyboard.
 About PCBasic
Time is money in your projects – and PCBasic gets it. PCBasic is a PCB assembly company that delivers fast, flawless results every time. Our comprehensive PCB assembly services include expert engineering support at every step, ensuring top quality in every board. As a leading PCB assembly manufacturer, we provide a one-stop solution that streamlines your supply chain. Partner with our advanced PCB prototype factory for quick turnarounds and superior results you can trust.
Before creating a custom keyboard PCB, it's important to understand the basic keyboard PCB design process. This process is typically divided into three main stages: schematic design, PCB layout, and design validation.
Schematic Design
Use tools like KiCad or EasyEDA to create the schematic. This step involves connecting all switches into a key matrix and linking them to the microcontroller. The schematic usually includes the rows and columns of the matrix, diodes to prevent key ghosting, power connections, and microcontroller pins. If your keyboard needs RGB lighting, an OLED display, or rotary encoders, you should also add those circuits during this stage.
PCB Layout
Once the schematic is complete, you can move on to PCB layout and routing. Start by placing the switch footprints based on your chosen layout, such as a 60% keyboard PCB or 65% keyboard PCB. Then, route the traces to connect all matrix lines to the microcontroller pins. Finally, define the board outline so that the finished keyboard PCB fits the case and plate properly.
Design Considerations
After routing is done, check the design carefully to avoid electrical problems. Use DRC (Design Rule Check) tools to find issues like shorts or open traces. Make sure power traces are wide enough to handle the expected current. If you plan to do testing or debugging later, add test points in key areas.
The entire keyboard PCB design process affects how well your custom keyboard PCB works in real use. For example, a 40% keyboard PCB has very limited space, so the layout must be compact and efficient. A full-size keyboard PCB requires longer traces, so you need to consider signal integrity and current flow to make sure every key functions reliably.

After you finish your design, the next step is to turn your custom keyboard PCB into a real product. This process includes preparing production files, selecting a PCB manufacturer, and choosing the assembly method.
Generate Production Files
Export all the necessary files from your PCB design software. These usually include Gerber files, a bill of materials (BOM), and Pick & Place files. Before sending them to the manufacturer, check everything carefully. Make sure the pads are aligned, the hole sizes are correct, and all components and traces are included.
Choose a PCB Manufacturer
Pick a reliable factory to produce your board. Common choices include JLCPCB, PCBWay, and OSH Park. When selecting a manufacturer, consider delivery time, cost, surface finish (such as ENIG gold plating), and minimum trace width. These factors can affect the quality and performance of your keyboard PCB.
Decide on the Assembly Method
You have two options for assembly. Manual soldering is good for experienced builders who enjoy hands-on work with DIY keyboard PCBs. The other option is full SMT assembly, where the factory handles all the soldering for you. This method is faster and more precise, especially for small surface-mount components.
At this point, your keyboard circuit board goes from a digital file to a physical board. Receiving your finished custom keyboard PCB from the factory is a rewarding moment for any DIY mechanical keyboard enthusiast.
Once you have your custom keyboard PCB, it's time to start building your DIY keyboard. This process includes installing stabilizers and switches, soldering, mounting everything into the case, and flashing the firmware.
Install Stabilizers and Switches
If you're using stabilizers, you may need to clip and lubricate them before installation. Then, insert the switches into the keyboard PCB. Whether you're using hot-swap sockets or soldered switches, make sure all pins are aligned correctly and fully inserted into the pads.
Soldering
If you choose to solder the switches, use a soldering iron and high-quality solder (63/37 tin-lead is recommended). Solder each switch pin to the keyboard board carefully. The joints should be solid and clean, with no cold joints or shorts.
Mount the PCB into the Case
After soldering, secure the keyboard PCB to the case using screws and standoffs. Install the plate and keycaps according to your selected layout, such as a 65% keyboard PCB, making sure everything fits tightly and looks clean.
Flash the Firmware
The final step is to flash the firmware. Use tools like QMK or VIA to load your custom layout. Configure layers, lighting effects, and macros as needed. Then, use a key testing tool to check that every key works properly.
Building a complete DIY mechanical keyboard is not just a technical task—it’s a creative project. It combines electronics, design, and personal expression, resulting in a fully customized device built by you, for you.
Designing and manufacturing a custom keyboard PCB is a highly technical yet highly personalized project. It combines circuit design, board wiring and hands-on assembly.
From mastering the function of each mechanical keyboard component to being proficient in keyboard PCB design, the path to creating an ideal DIY keyboard begins with the mastery of knowledge and tools.

Assembly Enquiry
Instant Quote
Phone contact

+86-755-27218592
In addition, we've prepared a Help Center. We recommend checking it before reaching out, as your question and its answer may already be clearly explained there.
Wechat Support

In addition, we've prepared a Help Center. We recommend checking it before reaching out, as your question and its answer may already be clearly explained there.
WhatsApp Support

In addition, we've prepared a Help Center. We recommend checking it before reaching out, as your question and its answer may already be clearly explained there.
