Has your favorite gadget ever suddenly stopped working? That's because there might be a short circuit in the PCB. From smartphones to household appliances, most electronic devices experience this!
According to The Electrical Safety Foundation International (ESFI) reports, electrical problems, including short circuits, cause about 51,000 home fires yearly in the U.S. Such problems compromise both our safety and our convenience, making this problem more critical than we realize.
So, to save you from this, we're here to help you walk through the basics of PCB short circuits. In this guide, we'll look into what causes the short circuit and how you can find it. Moreover, we'll also provide expert advice and easy-to-understand solutions to help you overcome and prevent these problems. Let's get started.
What is a PCB Short Circuit?

A PCB short circuit is an accidental connection between two or more points on a PCB. It usually causes a short circuit if the points are not electrically connected.
Well, it only partially relies on this. It can occur due to several other reasons as well. For instance, mistakes in manufacturing, design issues, physical harm, or parts not working correctly.
Here's a breakdown of what exactly occurs during a PCB short circuit for better understanding:
1. Unintended Connection: A PCB consists of different electronic parts and copper pathways (traces) that are designed to be electrically isolated from each other. When these traces become linked accidentally, they create a new path for electrical current, resulting in a short circuit.
2. Excessive Current Flow: A short circuit often causes the flow of electrical current to increase drastically. Because the shorted path offers very little resistance, the current bypasses its usual route, causing a current surge through the shorted connection.
3. Overheating: It is one of the most prevalent reasons. Localized overheating due to the increased current flow may harm components. Sometimes, it damages the PCB itself or, in extreme cases, poses a fire hazard.
4. Device Malfunction: Malfunction or complete device failure is a common outcome of PCB short circuits. For instance, a computer motherboard with a short circuit will cause unexpected shutdowns or error messages.
5. Blown Fuses: Many devices have protective features, such as fuses, which prevent excessive current flow. When extra current flows through the circuit, the fuse prevents further damage by blowing up and breaking the circuit.
Signs of PCB Short Circuits
If you're wondering what signs will be visible when your PCB expects a short circuit, you're at the right place. In this section, we'll look at some of the early signs that follow a PCB short circuit. Identifying these signs early can help diagnose and fix the problem quickly. So, let's dive into it.
1. Burning or Discoloration: If you look closely and discover that the PCB has burnt or discolored areas due to localized heating and damage, you must remember that it's one of the early signs of a short circuit.
2. Burning Smell: A short circuit can easily be identified through a pungent burning smell, identical to the smell of burning plastic. This smell comes from the heat generated during the short circuit.
3. Inconsistent Functionality: When a PCB short circuit occurs, devices often malfunction or behave strangely. For instance, a device that turns on and off spontaneously or responds unpredictably to user commands may indicate a short circuit.
Recognizing the signs of a PCB short circuit is of utmost importance for various reasons. First and foremost, it is a matter of safety. Short circuits can lead to electrical fires or damage to electronic devices, jeopardizing the well-being of individuals and property.
Moreover, early detection is crucial for maintaining the reliability and functionality of electronic devices. Unaddressed short circuits can cause malfunctions, unexpected shutdowns, or even complete failure, disrupting essential operations and incurring significant costs.

How to Find a Short Circuit on a PCB
Now that you know what precisely a PCB short circuit is and what its signs are, let's now move to how you would find it. As a general rule of thumb, detecting short circuits on a PCB is not a standard test conducted during prototype board testing.
Typically, if your PCB fabrication and assembly service performed in-circuit or continuity testing, they would have confirmed the PCB's connectivity against the netlist derived from your design files. As a result, unintended short circuits may only become apparent later when you power up the board and observe its performance.
Inspecting a PCB for short circuits can be accomplished in multiple ways. It is often identified with quick measurement input/output (I/O) points or power networks.
So, here are some of the primary methods for locating short circuits:
1. Visual Inspection
Any physical damage can easily be spotted through close visual inspection. Visual cues such as burn marks, color changes, or broken parts can explain where a short circuit might be. Here's how you do it:
● Set up a well-lit and clean workspace to begin your visual inspection. Good lighting is critical for examining small details.
● Safety first! Make sure to disconnect the power from the PCB and the device it's in.
● Examine the entire surface of the PCB, paying close attention to anything unusual, like dark areas (burn marks), discolored spots, often brown or black, and any components that look physically broken.
● You can also use a magnifying glass or microscope to inspect any detailed damage, allowing you to look for tiny or fine cracks.
● If your PCB has multiple layers, consider checking the inside layers through vias or open points.
A visual inspection will help you find physical signs of a short circuit, especially if the board is malfunctioning.

2. Thermal Imaging
Thermal imaging involves visualizing temperature variations to find potential PCB (Printed Circuit Board) short circuits.
Here's how you can use thermal imaging to spot PCB short circuits:
● Get an infrared camera, commonly known as a thermal imaging camera. These devices sense and display temperature variations on the PCB's surface.
● Switch on the thermal imaging camera and let it reach a stable working temperature.
● When the PCB is not powered, use your camera to take baseline thermal images. You can later compare these to the faulty PCB.
● Power on your PCB and capture pictures in real time. Pay extra attention to areas where you suspect a short circuit based on previous observations or tests.
● Compare the real-time thermal images with the baseline images taken when the PCB was off. Closely examine the photos for noticeably warmer spots, known as "hotspots," than the surrounding parts or traces.
● Analyze the thermal images for hotspots. These are areas that appear significantly warmer than the surrounding components or traces.
● Compare the real-time thermal images with the baseline images captured when the PCB was off.
3. X-Ray Inspection
If you have a multilayered PCB, visual inspection may be inadequate to find the short circuit. In such cases, X-ray inspection can help identify potential causes.
This method involves using X-ray technology to see through the layers of a PCB to find potential issues without taking the board apart.
● Before you begin, examine the X-ray inspection equipment, including the X-ray generator and digital detector, to ensure it is set up correctly and working.
● Adhere to strict safety protocols when handling X-ray equipment to prevent radiation exposure.
● Place the PCB on the inspection platform to observe it from various angles. This way, you can get a complete view of its inner layers.
● Start the X-ray process by passing the X-rays through the PCB. This creates contrast in the X-ray images due to differences in material density.
● A digital detector will help capture X-ray images from multiple angles, providing a detailed view of the PCB's internal structure.
● Analyze the X-ray images, looking for unintended connections or bridges between conductive traces or layers to find short circuits.
4. Destructive Testing
If the previous methods yield no results, you must switch to the last option, physically removing your board to find potential damage. Unlike non-destructive testing methods, which aim to identify issues without causing harm to the PCB, destructive testing requires disassembling the PCB to access its internal components and conduct tests that may irreversibly alter or damage the board.
The primary purpose of destructive testing is to pinpoint the exact location and cause of a short circuit, mainly when other non-destructive methods, such as visual inspection or thermal imaging, have not provided clear results.
For this testing, start by removing each component individually and performing multimeter tests on the exposed pads. This is an intensive form of testing and should only be used as a last resort when all other options have been tried. Once the short circuit is identified and the faulty component is located, it can be replaced or repaired to resolve the issue.
Destructive testing will help you identify which components are faulty and causing the short circuit. Although multimeter testing may not detect every issue with an element, it's an excellent method for finding the problematic component and replacing it to prevent future short circuits.
What Causes Short Circuits in PCB Boards
Here are some of the most prevalent reasons that cause a PCB short circuit.
1. External Contamination
Short circuits often result from external contamination after long-term operation in a board's intended environment. It's also possible for a board to come into contact with substances during assembly that fail due to a short circuit. These causes of short circuits include:
● Inadequate cleaning, including residues from flux
● The buildup of salts after exposure to water
● Contact with conductive dust or metal fragments
● Growth of copper dendrites between closely spaced conductors
Shielding a PCB from moisture and debris by placing it in a waterproof enclosure may not protect it from short circuits caused by no-clean flux residues. These residues possess some conductivity and may become more conductive over time.
2. Internal CAF Growth
Internal Conductive Anodic Filament (CAF) growth is a notable cause of short circuits in Printed Circuit Boards (PCBs). That's so because once the board is constructed, contaminants typically don't enter the interior of the PCB. However, electrochemical reactions within the internal layers may cause short circuits. In short, it is a phenomenon that occurs within the inner layers of a PCB and can lead to unintended connections between conductive traces or layers.
Over time, electrochemical reactions within the PCB's internal layers, often influenced by factors like humidity, temperature, and electrical bias, give rise to the formation of conductive anodic filaments. These filaments represent minuscule conductive pathways that bridge between the fiberglass bundles within the PCB's laminate.
Therefore, to mitigate CAF-related short circuits, you must employ various measures to minimize the presence of conductive contaminants, ensure proper insulation, and design PCBs to reduce the likelihood of filament formation. These precautions are essential for enhancing the reliability and safety of electronic devices and systems.
3. Dirty/Large Solder Paste Stencils and Misalignment
During the manufacturing of a PCB, solder paste is applied to component pads and holes. The design is then placed into a wave/reflow soldering line, causing the solder paste to melt and create the electrical connection from the components to the PCB. A misalignment in applying the solder paste to a component lead may cause a short circuit between two leads on a component. The misalignment could result in leads connecting neighboring pads or the solder forming a bridge between two leads.
The size of the PCB pad might now align with the stencil used for applying the solder paste, which might have aperture sizes. If the apertures are too large, the solder paste and resulting joints may spread over multiple pads. If they are too small, the solder joints may not consistently reach the lead, resulting in a weak connection. There may be a mismatch between the pad size in the footprint and the size of the component leads.
4. Uncaught Design Errors
In some cases, a design error may cause a short circuit. Without a thorough PCB design review before production, the final Printed Circuit Board Assemblies (PCBAs) may likely contain a short circuit and don't perform as intended.
Additionally, there is a netlist, which causes a list of connections between components in an electronic circuit. A mismatch in the netlist could lead to a short circuit or other issues in the PCB. This malfunction can be identified in Gerber files during an engineering review using a CAM application.
Moreover, if the CAM department finds a problem, they will send the project back to you with details about what needs to be corrected. This could involve adjusting the design files to fix the error.
How to Prevent a PCB Short Circuit
Preventing short circuits on Printed Circuit Boards (PCBs) is essential for ensuring the reliability and longevity of electronic devices. Here are various preventive measures to minimize the risk of short circuits:
1. Isolation Techniques: Use isolation techniques, such as isolation slots or trenches, to physically separate high-voltage and low-voltage components or traces on the PCB, reducing the risk of short circuits due to voltage differences.
2. Design Rule Checking (DRC): Implement Design Rule-checking software that enforces design constraints, ensuring minimum clearances and spacing requirements are met to prevent unintentional connections.
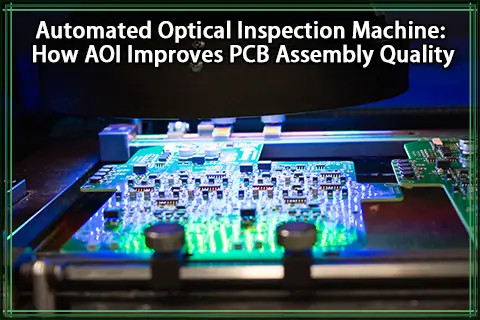
3. Automated Optical Inspection (AOI): Employ AOI systems to inspect PCBs during and after assembly. These systems use cameras and image processing to detect soldering defects, including solder bridges that can cause short circuits.
4. Controllable Current Limiting: Incorporate current-limiting components, such as resistors, in series with critical traces to limit the current in the event of a fault, reducing the risk of shorts.
5. Thermal Overload Protection: Integrate thermal protection devices, such as thermal cutoffs or fuses, which disconnect the circuit if the temperature exceeds a safe threshold, preventing overheating and potential short circuits.
FAQs About PCB Short Circuits
1. What is a PCB Short Circuit
A PCB short circuit is an unintended and improper electrical connection between two or more conductive elements on a Printed Circuit Board (PCB). This connection can disrupt the normal flow of current, potentially causing malfunctions or damage within the electronic circuit.
2. How Do You Fix a Short Circuit on PCBs
Fixing a short circuit on a PCB involves identifying the location of the short and then taking appropriate corrective measures. This may include re-soldering or replacing damaged components, repairing broken traces, or isolating the shorted area with insulating materials or techniques. The specific repair method depends on the nature and extent of the short circuit.
3. How Do I Know If My PCB is Shorted
To determine if a PCB is shorted, you can perform continuity testing using a multimeter. Set the multimeter to the continuity or resistance mode and check for low resistance or a beep when probing different points on the PCB. A low resistance or audible beep indicates a short circuit. Visual inspection and thermal imaging can also help identify shorted areas.
4. How to Find the Faulty Components on a PCB
Finding faulty components on a PCB involves a systematic troubleshooting process. Start by inspecting the PCB visually for physical damage, burnt components, or visible defects. Use a multimeter to test the continuity and resistance of components. In some cases, thermal imaging can help identify overheating components. Schematic diagrams and datasheets are valuable resources for component identification and testing. Replacing or reworking the faulty component is often the solution to fix the issue.
Conclusion
PCB short circuits are more than just technical glitches; they have the potential to disrupt our daily lives and compromise safety. Therefore, recognizing the early signs of a short circuit, such as burning or discoloration, is essential for quick diagnosis and resolution.
Once you've found the problem, visual inspections and advanced techniques like thermal imaging and X-ray inspection can help you pinpoint problem areas. Moreover, understanding the common causes of PCB short circuits is equally important for prevention. For instance, techniques like isolation and design rule checking, as well as advanced processes like automated optical inspection, can help minimize the risk.
So, in a world where electronic devices are integral to our daily routines, knowledge of how short circuits work empowers us to ensure the reliability of our gadgets and maintain safety standards. Whether you're an expert in the field or simply curious, staying informed and vigilant is the key to avoiding PCB short circuits and keeping our devices running smoothly and securely.