PCB
Assembly (PCBA) is the process of mounting and soldering electronic components
onto a bare PCB, transforming it from a non-functional circuit board into an operational
electronic system. In simple terms, a PCB provides the structure and electrical
pathways, while the assembly process brings it to life with functionality.
The
complete PCB assembly process typically involves multiple key steps, such as
solder paste printing, component placement, reflow soldering, through-hole assembly
(THT), and subsequent inspection and testing. Depending on the product design
and production requirements, the process may involve SMT, THT, or a hybrid
assembly approach.
In
this guide, we will focus on analyzing the core concepts of PCB assembly and
the complete assembly process at PCBasic, helping you clearly understand how
each key stage works together to transform design files into high-quality
finished circuit boards.
Whether
you are new to PCBA or looking to gain a deeper understanding of the PCBA
manufacturing process, this guide will provide you with clear and practical
references.
Let's
get started!
Understanding PCB Structure Before Assembly
Before learning the PCB assembly
process, it is important to understand the basic structure of a PCB.

A PCB is built on a
substrate, usually made of FR-4
fiberglass, which is used to provide support.
Copper circuits will be etched on the substrate surface to connect various parts of the circuit.
A pad is a metal area used for soldering components. Components
like resistors, capacitors, and ICs are soldered onto pads or inserted into through holes to give the PCB its function.
Plated
through-holes (PTH) are
used to connect different layers and determine whether a PCB is single-layer,
double-layer or multilayer.
Vias are copper-plated holes to enable
conduction between layers.
The solder mask is applied to the copper traces to prevent short circuits and corrosion.
The silkscreen layer is used to show component labels,
polarity marks and logos.
The goal of PCB design is to turn circuit requirements into a reasonable layout to facilitate
subsequent assembly. Understanding these basics is helpful for better learning
the PCB assembly process.
What is PCB Assembly?
So,
what is PCB assembly? Simply put, PCB assembly is the process of soldering
electronic components onto a PCB, transforming a non-functional bare board into
a functional circuit board.

Nowadays,
most PCB assembly is carried out relying on automated equipment. However, in certain
cases, manual work is still required. Surface mount technology (SMT) can
directly mount components onto pads, significantly enhancing efficiency and
promoting product miniaturization. In some structure designs or mechanical strength
requirements, through-hole technology (THT) remains irreplaceable.
For
multilayer PCBs, components can also be mounted on both sides or even within
the internal structure. After soldering, additional reinforcement is usually
carried out to enhance the vibration resistance. Subsequently, the soldering
quality is confirmed through inspection and testing to ensure there are no
problems such as shorts or poor solder joints.
Depending
on the production volume, PCB assembly is generally divided into low, medium,
and high-volume production. High-volume production is more suitable for
automation to reduce costs and improve efficiency. However, low-volume or prototype
builds rely more on manual assembly for greater flexibility.
From
design files to real products, PCB assembly is the key step in turning circuits
into life.
PCBA Manufacturing Process
The three predominant assembly
methods include surface mount technology (SMT), through-hole technology (THT),
and a hybrid method combining both SMT and THT.
Surface Mount Technology (SMT)
Assembly
SMT enables components to be
mounted directly onto PCB surface pads instead of through holes, revolutionizing
electronics assembly and driving product miniaturization. SMT assembly relies
on automated pick-and-place to achieve high-speed and high-precision production
processes, including:

Solder
Paste Printing:
The PCB first passes under a stencil
that matches the solder pad layout. A squeegee evenly applies a layer of solder
paste onto the solder pads. The paste not only serves as an adhesive but also
forms solder joints during reflow.
Component
Placement:
The automatic pick-and-place machine
picks components from material reels and accurately places them on the
corresponding pads according to the programmed instructions. These machines
achieve continuous supply through vacuum nozzles and feeders, and with the help
of an optical alignment system, they can achieve high-precision placement up to
0.1mm or better.
Reflow
Soldering:
After placement, the PCB enters
the reflow oven, where it is gradually heated through different temperature
zones. The soldering is completed at the peak temperature (usually 200-250 °C,
lasting for 60-90 seconds), and then cooled under controlled conditions. A
nitrogen atmosphere can be used during the soldering process to prevent
oxidation.
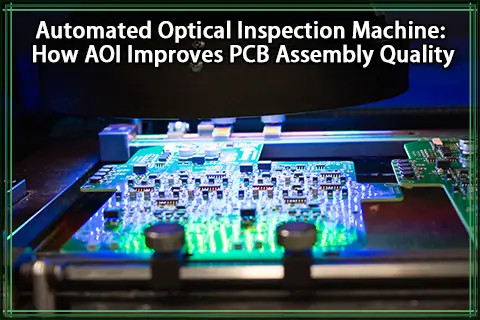
Automated
Optical Inspection (AOI):
After reflow soldering, the
component positions are verified to be correct, and there are no obvious
defects through inspection systems.
First
Article Inspection:
The first assembled PCB will
undergo a comprehensive inspection under a microscope, including placement,
orientation, and solder joint quality. To enhance efficiency, the PCBasic
factory independently developed the first article tester, which can
automatically test the performance and functionality of PCBs, reducing human
errors.
Flying
Probe Testing:
Probes test each pad for
electrical continuity and detect any short circuits, ensuring product quality before
shipment.
SMT offers high efficiency and
high consistency, making it highly suitable for mass production. However, it requires
significant investment in equipment, including stencil, printers,
pick-and-place machines, reflow ovens, and AOI systems. However, in large-scale
production, these costs can be effectively reduced at scale.
Through
Hole Technology (THT) Assembly
After SMT is completed,
through-hole technology (THT) will be used when the product requires higher
mechanical strength or specific structural requirements. Unlike SMT components,
THT components have leads that need to be inserted into the corresponding
through holes on the PCB.
The THT assembly process
includes:

Component
Insertion
According to the assembly file,
technicians insert the components into the designed through holes. Components
are usually prepared in advance to improve efficiency.
Lead
Bending
Excess leads are bent flush
against the PCB surface to prevent movement during the soldering process,
thereby ensuring stability.
Wave
Soldering
The PCB passes over a wave of
molten solder at approximately 230-260 °C to form a strong solder joint between
leads and pads. Common solder alloys include SAC305 or Sn63Pb37, and nitrogen
protection can also be adopted to prevent oxidation. Flux is used to improve
wetting. After soldering, it is cleaned to remove residues.
Cleaning
Use suitable solvents to remove flux
residues and prevent corrosion.
Inspection
Confirm the component placement,
orientation and solder joint quality through manual visual inspection.
Testing
Continuity testing, often
combined with ICT or flying probe testing, is used to detect whether there are
short or open circuits. After production is completed, QA personnel will also
use professional equipment for inspection, and even patented testing systems are
used to verify whether the components are consistent with the customer's BOM.
THT is suitable for larger or
high-power components and also provides strong mechanical strength. However,
its speed is relatively slow, and the labor cost is higher than SMT. However,
the equipment investment is relatively lower, making it suitable for low-volume
production.
Hybrid Assembly

For PCBs that contain both SMT
and THT components, a hybrid assembly method will be adopted.
This technology usually completes
SMT assembly first, followed by THT insertion and wave soldering. It combines
the high efficiency of SMT with the high strength of THT, and is suitable for
PCB products with complex structures.
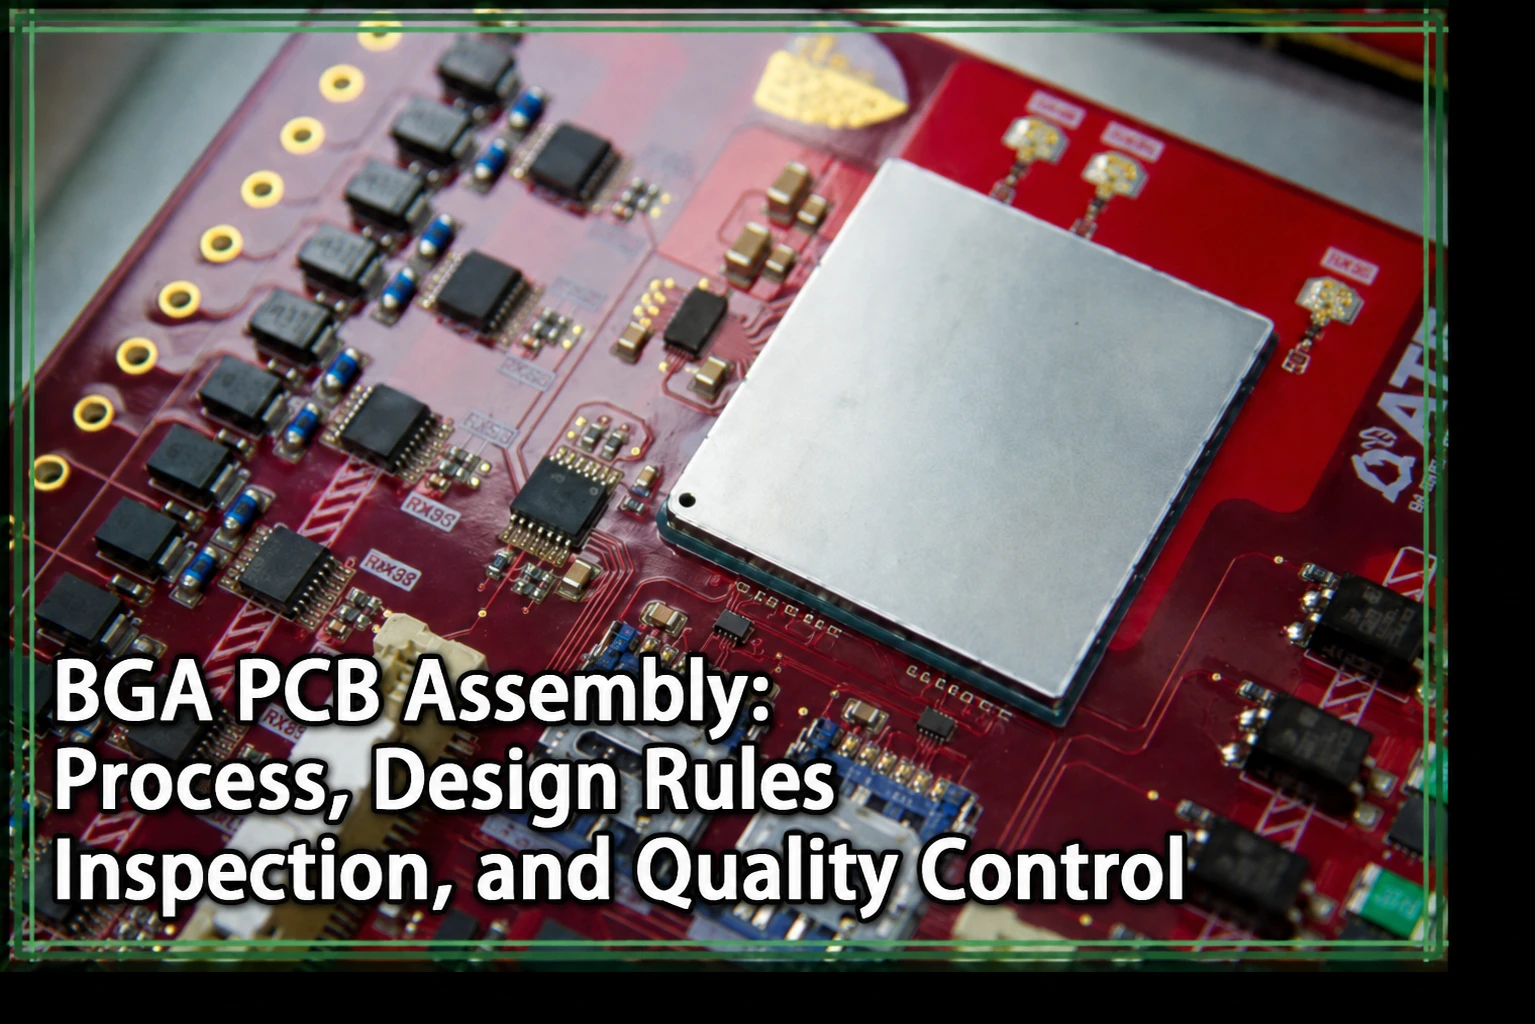
BGA Assembly
In
SMT assembly, an advanced packaging form - BGA (Ball Grid Array) assembly - is
being increasingly widely applied in complex equipment with high I/O density.
Now, let's learn what BGA assembly is.

BGA components utilize a grid of
solder balls on the underside as their terminations instead of leads or pads. BGA
packages offer several advantages:
● Higher densities accommodating more I/Os
in compact footprints
● Reduced inductance for faster electrical
speeds
● Resilience to mechanical stresses from
thermal expansion
● Capability for higher pin counts reaching
the thousands
● Suitability for advanced IC packaging like
CPUs
However, assembling BGAs poses
challenges not encountered with standard SMT components:
● Precise solder ball alignment to PCB lands
is critical
● Limited visual inspection access
underneath the package
● Low clearance between solder balls risks
shorts
● High-temperature assembly can damage the
ball grid
● Rework is very difficult after attachment
Therefore, BGA assembly requires
more advanced equipment and processes to handle the challenges brought by
high-density packaging. Despite this, its performance advantages continue to
drive widespread adoption across industries.
Our factory has developed
specialized capabilities to assemble BGAs, including:
● Advanced stencil printing with 3D optical
inspection
● Pick-and-place with precision split optics
alignment
● Profile-optimized convection reflow ovens
● High-resolution X-ray inspection and 2D/3D
CT scanning
● Boundary scan testing for packaged devices
● Conformal coating options to improve
reliability
So whether your designs require
100 or 10,000 ball grid array packages, we have the cutting-edge
processes and expertise to deliver defect-free, high-yield BGA assembly catered
to your technical requirements and production volumes.
SMT, THT, and hybrid assembly
each offer specific advantages that make them suitable for particular
applications, depending on factors such as quantities, component selections,
product complexity, quality targets, and production environments.
Overall, we've got an experienced
team that can evaluate your product assembly requirements and recommend the
ideal process to deliver high-quality boards on time and within budget.
SMT vs. THT vs. Mixed PCB
Assembly
Now that we've covered the major
PCB assembly techniques in detail, it helps to directly compare surface mount
(SMT), through-hole (THT), and mixed technology approaches to comprehend their
respective advantages and applications.
First, let's explore a high-level
comparison between SMT and THT assembly:
SMT vs THT
Think sleek. Think modern. That's
SMT for you. As its name suggests, SMT involves placing components directly on
the surface of a PCB. This method allows for a high component density, and
given that components can be mounted on both sides of the board, it's no
surprise that it's the method of choice for most modern electronic devices.
Now, if SMT was the fresh-faced
newcomer, THT is the wise old sage. THT involves inserting component leads
through holes drilled in the PCB and then soldering them on the other side.
This technique, which dominated electronics manufacturing for decades, offers
robustness and reliability.
|
SMT Assembly
|
THT Assembly
|
|
Components
have leads/pads on the bottom
|
Components
have leads inserted into holes
|
|
Automated pick-and-place
|
Manual
insertion by technicians
|
|
Small
components sizes
|
Supports
larger components
|
|
Higher component density
|
Lower
component density
|
|
Reflow
soldering
|
Wave
soldering
|
|
Higher initial investment
|
Lower
startup costs
|
|
Faster
assembly speed
|
Lower
production rate
|
|
Ideal for high-volume PCBA manufacturing
|
Suited
for low- to medium-volume PCBA manufacturing
|
|
More
difficult rework
|
Easier
rework
|
SMT was a game-changer in
electronics assembly and manufacturing, enabling automated production by
eliminating the need to insert lead components manually. The pick-and-place
machines and reflow process brought speed, precision, and quality to high-volume
assembly. It expanded possibilities for miniaturization.
However, SMT has notable
disadvantages, like high equipment startup costs and challenges during
reworking defective parts on dense boards. This makes THT still preferable for
quick-turn prototypes or lower quantity jobs where manual assembly has advantages.
THT also supports component types unsuited to SMT, like bulky connectors or
transformers.
Mixed vs SMT vs THT Assembly
But what if you want the best of
both worlds? That's Mixed Assembly. This method combines the advantages of both
SMT and THT. A typical scenario might involve using SMT for most components
while reserving THT for components that require robust anchoring, like
connectors or large capacitors.
Now let's compare mixed
technology assembly, which combines both SMT and THT processes:
|
Mixed Technology
|
SMT and THT Separately
|
|
Single unified process
|
Separate SMT and THT lines
|
|
Lower investment in equipment
|
Duplicated SMT and THT equipment
|
|
Potential soldering defects
|
Optimized process for each
|
|
Compromised optimization
|
Maximum quality on each line
|
|
Technical complexity
|
Simpler individual processes
|
Performing SMT and THT assembly
concurrently can lower capital costs by reducing equipment redundancies.
However, bridging flaws and other defects often arise when integrating both
soldering processes in one pass. This fuels a reliance on extensive inspection
and rework to ensure quality.
Separate lines optimized
specifically for SMT and THT provide maximum control, quality, and yield for
each technology type. This does require increased investment in duplicating
equipment, but provides independent optimization and simplified processes focused
on a single assembly technique.
Alright, below is a table
summarizing the core differences between SMT, THT, and mixed assembly
processes:
|
Assembly Type
|
SMT
|
THT
|
Mixed
|
|
Component Style
|
Surface mount
|
Through-hole
|
Both
|
|
Equipment
|
Pick-and-place machine
|
Soldering irons, wave soldering
|
Requires both
|
|
Automation
|
Fully automated
|
Manual
|
Partial
|
|
Speed
|
Very fast
|
Slow
|
Moderate
|
|
Costs
|
High startup and
production costs
|
Low startup and production costs
|
Balanced
|
|
Defect Rate
|
Lower
|
Higher
|
Highest
|
|
Volume Suitability
|
High
|
Low/Medium
|
Medium/High
|
In summary, the assembly
technique selected dramatically impacts quality, costs, and production
capabilities. SMT favors high-volume automated production. THT supports lower
volumes with flexibility. Mixed technology strikes a balance between the two
while increasing process risks.
Manual vs. Automated PCB Assembly
When embarking on a PCB assembly
project, one crucial decision is whether to utilize manual or automated
manufacturing processes. Each approach carries distinct advantages and
limitations depending on factors like production volumes, quality requirements,
costs, and technical complexity. Let's explore these key differences.
Manual PCB Assembly

Manual assembly involves skilled
technicians using microscopes, tweezers, and soldering irons to meticulously
place and attach components onto PCBs by hand. It affords tremendous
flexibility during prototyping when design changes are still occurring.
Engineers can modify component
placements or swap parts without extensive reprogramming, as is required with
automated equipment. For low-volume production, manual assembly keeps startup
costs affordable since minimal equipment is needed. However, it inevitably
sacrifices speed. Populating boards manually is quite tedious and
time-consuming, making manual methods ill-suited for medium or high production
levels.
Technicians must undergo
extensive training to become adept at the delicate process of precision
component positioning and soldering. But human fallibility means some
inconsistency and errors are unavoidable. Each board produced manually won't be
identical.
While inspecting each board can
mitigate this, increased quality control steps impact the throughput. The costs
of manual labor at scale also add up rapidly. Yet for assembling highly complex
or low-quantity boards, experienced technicians still reign supreme.
Automated PCB Assembly

In contrast, automated assembly
utilizes advanced robotic equipment to place and solder components. Programmed
pick-and-place machines precisely populate boards an order of magnitude faster
than humanly possible. For high-volume production, automation achieves
unparalleled consistency and speed with minimal errors.
But first, the machines require
extensive upfront programming based on the board design to define the placement
routines. This lacks flexibility since any component or layout changes later
mean reprogramming the lines.
While automated optical
inspection and testing catch most defects, the systems lack human judgment for
spotting subtle anomalies. Rework also proves challenging since technicians
cannot simply tweak individual joints. Instead, correcting issues requires pulling
the board from the line and either reprogramming the system or performing
manual touch-ups.
The fixed costs of automated
equipment and programming are only justified once amortized over thousands of
boards. Automation enables round-the-clock production unattended, but the
reduced labor costs trade off with larger capital costs.
Smaller businesses may find it
daunting to budget six-figure investments in proprietary pick-and-place systems
just to get started. However, large OEMs running high-volume production count
on automation to stay competitive.
Below is a comparison table
summarizing the key differences between manual and automated PCB assembly:
|
Factor
|
Manual
Assembly
|
Automated
Assembly
|
|
Costs
|
Lower
startup costs, higher labor costs
|
Higher
initial investment
|
|
Speed
|
Very
slow, tedious process
|
Extremely
rapid, unattended
|
|
Changeover/Flexibility
|
Design
changes are easily accommodated
|
Requires
reprogramming lines for each change
|
|
Labor Requirements
|
Highly
skilled technicians
|
Lower
headcount plus skilled programmers
|
|
Quality
|
Prone
to human errors and inconsistencies
|
High
consistency and precision
|
|
Volume Suitability
|
Ideal
for prototypes and low quantities
|
Optimized
for mass production
|
|
Process
Control
|
Greater
ability to catch subtle defects through inspection
|
Depends
more on programming and machine vision
|
|
Fault Recovery
|
Easier
rework of solder joints
|
Challenging
reprogramming just for repairs
|
In essence, manual techniques
support low-volume complexity, while automation facilitates high-volume
consistency. Astute engineers will leverage the best of both worlds by
combining manual and automated processes for optimum flexibility, quality, and
cost control.
The goal is to determine the
ideal balance between automation efficiencies and manual techniques for the
particular product. With expertise across the spectrum of assembly methods, our
seasoned team stands ready to help identify the ideal solutions to fit your
specific application.
Low Volume, Medium Volume, and
High-Volume PCB Assembly
PCB assembly volumes vary
tremendously across sectors and applications. Optimizing processes for building
1,000 boards monthly entails vastly different considerations than a million
boards annually. Let's look at how assembly factors differ across low, medium,
and high-volume production.
Low-Volume PCBA
At the lower end, volumes under 1,000 boards per month constitute a
low-volume assembly. Here, flexible manual techniques are generally the most practical
and cost-effective. The fixed costs of specialized equipment can only be
justified with massive quantities.
For low volumes, skilled
technicians can meticulously hand-place and solder components without luxuries
like automated optical inspection. Minimal startup costs make manual assembly
accessible for smaller companies. Shorter assembly runs are also easier to
schedule when capacity isn't booked out on fixed automated lines.
The downside is less throughput,
higher labor costs, and potential quality inconsistencies. Yet the hands-on
approach allows engineers to tweak designs or customize builds. With attention
to quality control and screening, manual methods yield high returns for complex
low-volume assemblies.
Middle-Volume PCBA
In the middle tier, volumes
between 1,000 and 10,000 boards per month signal gains from moderate
automation. Production scales enough to potentially recoup investments in basic
pick-and-place machines or selective soldering.
This supplement manual provides
activities to boost productivity on repetitive tasks while preserving
flexibility for custom elements. Balancing automation efficiencies against
manual oversight and rework allows economical ramping to mid-tier quantities.
Testing and inspections remain
essential safeguards as volumes climb. The mix of automated plus manual
techniques provides a scalable bridge before committing to fully automated
high-volume lines.
High-Volume PCBA
Finally, volumes exceeding 10,000
boards per month demand dedicated high-volume assembly lines. Here, the
astronomical throughput of advanced pick-and-place systems and rapid soldering
modules pays dividends.
With substantial fixed costs
budgeted upfront, automation maximizes consistency and quality at fractions of
manual assembly costs. High-volume PCBA manufacturing depends on these
sophisticated, high-precision techniques to stay globally competitive.
The highly automated facilities
run nearly around the clock, cranking out boats. But with limited manual
oversight, rigorous inline testing and inspection must catch any occasional
defects. High-volume automation trades hands-on flexibility for unmatched
speeds and economies of scale.
Here is a table that summarizes
how core considerations differ across low, medium, and high-volume PCB
assembly:
|
Factor
|
Low-volume
|
Medium Volume
|
High
Volume
|
|
Quantities
|
<1,000
boards/month
|
1,000-10,000
boards/month
|
>10,000
boards/month
|
|
Cost Considerations
|
Minimized
startup costs
|
Balanced
investments
|
Maximum
automation
|
|
Labor
Requirements
|
Higher,
manual
|
Moderate,
mixed
|
Lower,
programming-focused
|
|
Quality Approach
|
Inspection-driven
|
Increased
automation plus inspection
|
Automated
inline testing
|
|
Assembly
Type
|
Manual
|
Manual
+ moderate automation
|
Dedicated
automated lines
|
|
Production Environment
|
Flexible
|
Semi-fixed
|
Continuous
mass production
|
|
Changeover
|
Frequent
revisions accommodated
|
Some
flexibility remains
|
Fixed
automated routines
|
Recognizing where volumes justify
transitions between manual, semi-automated, and high-volume techniques is
crucial. Seeking the optimal intersections maximizes quality and cost control
throughout scaling.
With expertise across this entire
spectrum, our adaptable factory has the ability to deliver both the precision
of automation and the care of manual craftsmanship.
Whether you require a hundred
intricately assembled prototypes or a million boards flowing daily, our team
has the know-how to identify assembly solutions tailored to your specific
volumes and production needs.

Why PCBasic is a Reliable PCB Assembly
Manufacturer
With over 15 years of perfecting our craft, PCBasic has earned a reputation
as a trusted provider of exemplary PCBA solutions. We stand behind our
commitment to deliver swift service without compromising quality.
Our expertise across the spectrum of PCBA technology and PCB design
services enables us to identify and implement customized solutions tailored to
each client's unique requirements.
Our forward-thinking development of proprietary management systems
demonstrates our dedication to digital intelligence and cementing our status as
an industry frontrunner.
Furthermore, we've garnered invaluable proficiency serving diverse sectors
through our rigorous approach to prototyping, testing, and ensuring
functionality first and foremost.
When partnering with PCBasic, you gain a resource dedicated to fully
comprehending your objectives and ensuring a seamless journey from concept to
delivery.
Our obsessive focus on quality, coupled with a collaborative spirit, makes
us the ideal manufacturing partner for your next PCB assembly project.
Terminology Related to PCB and PCBA Manufacturing
Last, I've gathered some
terminology related to PCB and PCB assembly process for better understanding:
Annular Ring
The annular ring refers to the
exposed copper area surrounding a plated through hole on a printed circuit
board. It provides the surface where solder can adhere to form a reliable
connection between the PTH barrel and the pad or plane on the outer layer. A
sufficient annular ring width is required to ensure adequate solder joint
strength.
DRC
Design rule checking (DRC) is an
essential verification step in PCB design. DRC analyzes the board layout
against a preset list of constraints related to spacing, clearances, pad sizes,
etc. Any violations get flagged for designers to correct. This avoids potential
manufacturability issues downstream.
Drill Hit
A drill hit refers to where a
drill bit will create a hole in the PCB substrate during fabrication. Drill
hits represent locations of vias or through-hole pads where component leads
will be inserted.
Finger
A finger refers to a long, thin
protrusion extending from a pad, trace, or pour area. It is used to increase
the available contact surface for soldering or component mounting. Fingers help
maximize mechanical adhesion and electrical connectivity.
Mouse Bites
Mouse bites are small voids
purposefully designed into copper features on a PCB to prevent solder wicking.
The "bites" constrain solder flow, helping prevent shorts between
closely spaced traces or pads during assembly.
Pad
A pad is a conductive area
(usually copper) on the PCB surface where component leads or wires are
soldered. Pads connect to inner layer traces, allowing electrical connectivity.
Panel
A panel refers to a larger board
from which individual PCBs are cut. Manufacturing identical boards in a panel
arrangement improves fabrication efficiency. The boards are later depanelized.
Paste Stencil
A paste stencil is a thin metal
sheet laser-cut with apertures matching the solder pads on the PCB. During
assembly, it deposits solder paste precisely onto pads before component
placement.
Pick and
Place
Pick and place machines
automatically select components and accurately place them onto their pads on a
PCB. This automates the population of boards in preparation for soldering.
Plane
A plane is a continuous copper
area serving as a low-impedance reference in a circuit. Planes provide large
ground or power networks, enhancing electrical performance.
Plated Through Hole (PTH)
PTHs are holes with conductive
barrel walls allowing connections between layers in a multilayer PCB.
Electroless plating deposits copper to facilitate component insertion.
Pogo Pin
Pogo pins are spring-loaded pins
used to make reliable temporary electrical connections, such as interfacing ICT
fixtures with boards during testing. The pins compress on contact.
Reflow Soldering
Reflow soldering uses precisely
timed heating to melt solder paste deposits, forming reliable electrical joints
between pads and component leads. This is the primary soldering process in SMT
assembly.
Solder Paste
Solder paste contains suspended
solder alloy particles blended with flux. It is printed on pads, providing
temporary adhesion for components before permanent reflow soldering.