Global high-mix volume high-speed PCBA manufacturer
9:00 -18:00, Mon. - Fri. (GMT+8)
9:00 -12:00, Sat. (GMT+8)
(Except Chinese public holidays)
Global high-mix volume high-speed PCBA manufacturer
9:00 -18:00, Mon. - Fri. (GMT+8)
9:00 -12:00, Sat. (GMT+8)
(Except Chinese public holidays)
HomePage > Blog > > Through-Hole Soldering: A Guide to the Best Practices
Through-hole soldering is important for people who work with electronic circuits. Soldering is the process that connects electronic components with a printed circuit board (PCB). They are connected using metal leads that pass through holes in the board.
This process leads to strong circuits that can deal with stress and environmental conditions.
Let us look into the details of thru-hole soldering. You will get to learn about what through-hole soldering is and how to solder through holes. With this soldering tutorial, you will be able to create professional and permanent electronic circuits.
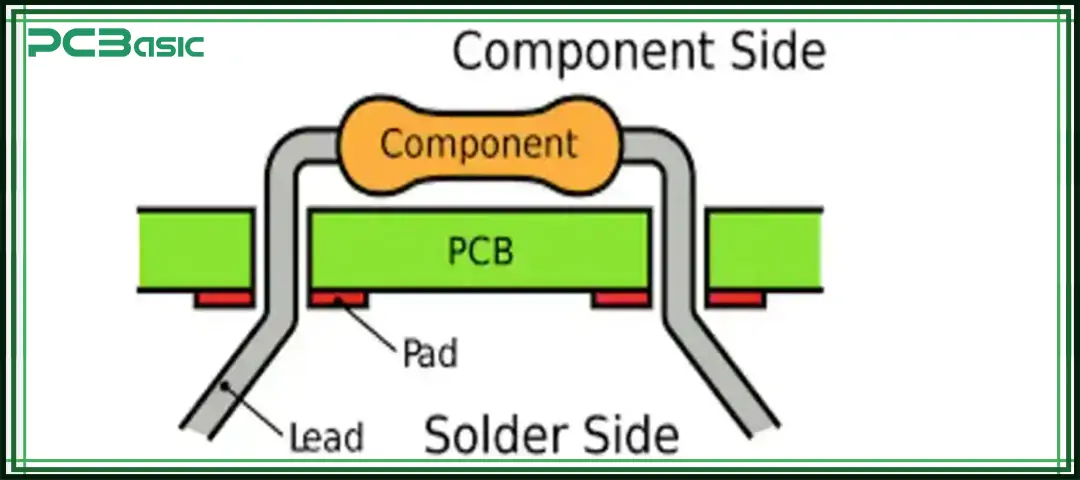
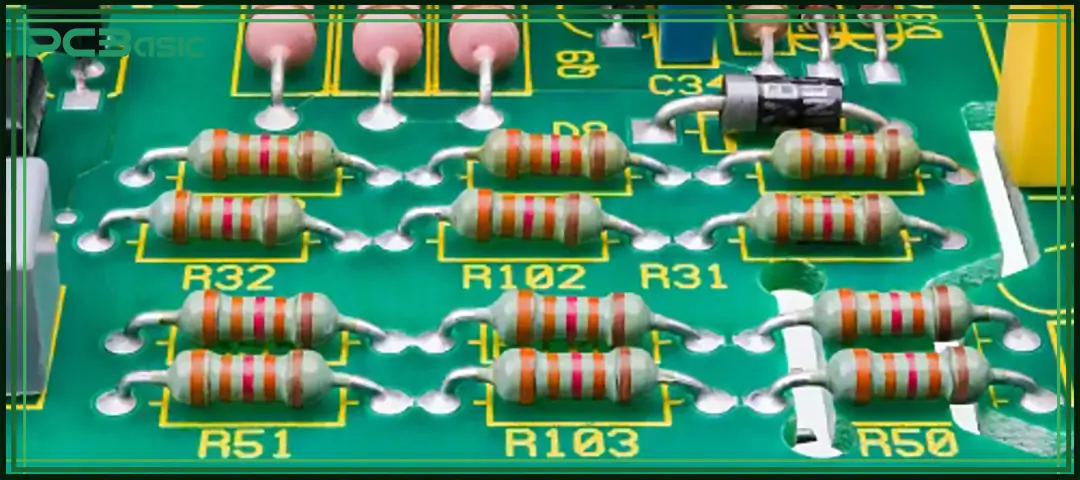
Through-hole soldering is a crucial technique of electronics manufacturing. It includes the connection of leads of various components through the holes to the base of the printed circuit board (PCB) and then soldering the components.

It is important to notice that mechanical stability is one of the primary advantages of hole soldering. There is a good interconnection between the component leads and the PCB that creates a strong bond. Such a link is capable of enduring stress, vibrations, and other external impacts.
This makes it ideal for applications such as industrial control, military equipment, and health devices, hence the need to develop systems that incorporate this attribute.
THT soldering also has the benefit of being simple to repair. It is frequently possible to desolder and replace the damaged part without causing any damage to the PCB. Surface mount components, on the other hand, can be more challenging to remove and replace. It works especially well with larger parts, like those with thicker leads.
Both Through-Hole and Surface-Mount are used to attach components to PCBs. However, through-hole vs surface mount have some differences:
|
Characteristics |
Through Hole |
Surface Mount |
|
Component Arrangement |
Components are placed via holes in the PCB and soldered from the sides through through-hole soldering. |
When using surface mount technology, parts are soldered to pads straight on the PCB's top surface. |
|
Component Size |
Thanks to the longer and more spacious leads of through-hole components compared to surface-mount components. The PCB can have more room between components. |
Thanks to their reduced size and ability to be arranged closer together. Surface-mount components can achieve higher component density. |
|
Manufacturing Process |
Both automated equipment and manual labor are available for through-hole soldering. |
Automated machinery is used for surface mount soldering. |
|
Easy Repair |
Through-hole soldering facilitates greater repair capacity because it allows users to desolder and replace components without damaging the PCB. |
Removing and replacing surface mount components is more challenging. |
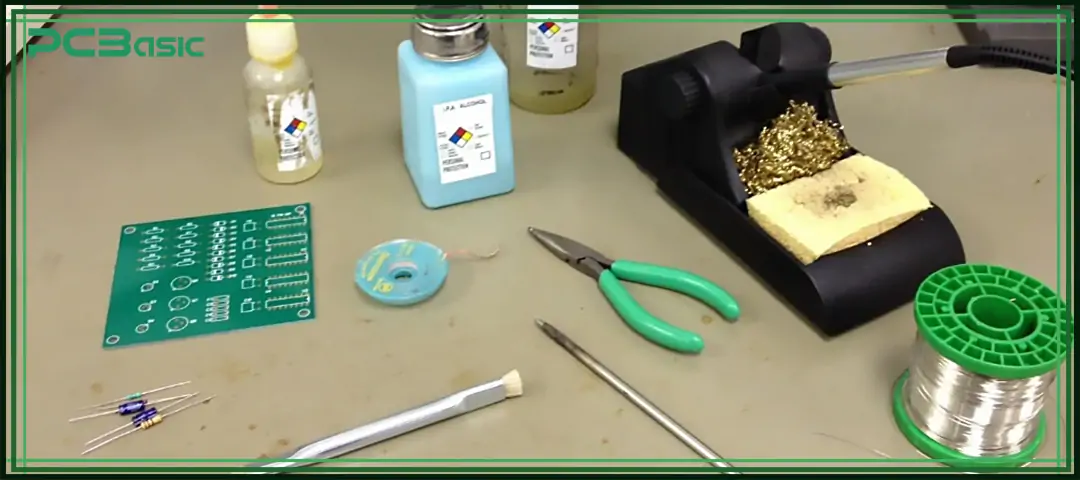
Soldering through-hole components is a bit challenging and this requires precision and expertise. Make sure that the working space of your office is clean first and very well illuminated. Prepare all necessary instruments, including the pliers, wire cutters, flux, solder and soldering iron, etc.
Now let us turn attention to the basics of Through Hole soldering capabilities. It is possible to select the most suitable tools for you through hole soldering activities and achieve excellent outcomes knowing about the peculiarities of these remarkable instruments.

New versions of tiny soldering irons are now equipped with temperature regulation. These irons have the ability to change the angle of the tip to enhance comfort.
The component leads and the tip size must match. Leads with larger diameters are more suitable for larger tips. The leads that contain delicate components are more suitable for small tips.
To avoid any damage make sure to use a soldering iron with a temperature control feature. This will help you set the temperature of the iron for different components.
The use of lead-free has gained more popularity due to health and safety issues. However, in aerospace and military, solders may contain lead.
It is important to have an understanding of the characteristics of solder as it is important to know their melting point and also properties of the material.
The effect of lead depends on the total composition of the alloys used. Some of the alloys included tin-lead, tin-silver-copper, and lead-free tin-silver-copper.
A rosin core, which acts as a flow and prevents solder from rusting, is found in most of the solders.
Fluxes are provided in liquid, paste, and gel styles. This means that the soldering process depends on the type of liquid metal used. This also depends on the type of application and the components involved.
Soldering gives way to water-soluble flux from the board and retains clean flux in the board. The decision to use water-soluble or non-clean flux depends on the kind of cleanliness that is desirable in the finished product.
· Desoldering Pumps: These pumps use suction to remove solder on joints. However, It is used in small-scale desoldering operations because they are available in the market.
· Solder Wick: A copper mesh that is stocked in the solder mentioned above is referred to as solder wick and its role is to wick away extra solder. Thus, by careful selection of its position, it becomes quite versatile to remove solder from various types of crossings.
· Desoldering Irons: These enhanced gizmos, with their hot tip and vacuum pump, make it possible to remove solder with magnificent precision. Smaller or simpler desoldering tasks should not be handled by them. Instead, such topics should be given to them.
· Tweezers: Use tweezers and welding for some delicate elements and tiny details.
· Wire Strippers: In wires before soldering, they can have their insulating cover stripped off using the wire stripper.
· Third-Hand Soldering Aid: That is because the third hand will hold other components in place during the soldering process, freeing your hands.
· Magnifying lens: I found it easier to view solder joints along with small components in the circuit with the help of a magnifying lens.
 About PCBasic
Time is money in your projects – and PCBasic gets it. PCBasic is a PCB assembly company that delivers fast, flawless results every time. Our comprehensive PCB assembly services include expert engineering support at every step, ensuring top quality in every board. As a leading PCB assembly manufacturer, we provide a one-stop solution that streamlines your supply chain. Partner with our advanced PCB prototype factory for quick turnarounds and superior results you can trust.
Here is a simple way for your THT soldering process that will make it super easy for you:

1. Getting Ready for Soldering
The first step is to make sure you have a proper working space. Do clean it thoroughly and make sure you have good lighting for soldering. Then, gather all the necessary tools and equipment. This includes wire cutters, flux, solder, and soldering iron. You should also remove any extra things or stuff from the board to make sure there is nothing interfering with the process of soldering.
2. Placing Components
In the second step, you have to pass the component through the PCB. Make sure you pass them through the right holes with a little force. Check that everything is correctly placed and there are no broken pieces. It can be hard to keep components in place. For this, you can use tweezers or third hand to keep components in place before soldering.
3. Utilizing Flux
Another important thing about THT soldering is the flux. It can act as a solvent. Flux removes oxides and contaminants from the areas that require joining and leaves the environment clean. The whole process leads to a solid solders connection. You can also achieve a thin layer to minimize oxidation and wet soldering by using the solder component leads and the soldering pads on the PCB.
4. Warming Up the Joint
Do you want a perfect solder? It is important to warm up the joint and make sure the soldering iron is at the right temperature. Make sure that the tip is warm enough to melt the solder. After you see the solder in the capillary action, it is time to remove the soldering iron.
Touch the soldering pad and solder component softly. You will see a spherical junction that solders create and that is flowing freely. This is the ideal scenario. If your soldering iron is not hot enough, it may disrupt the functions and lead to a nonflowing solder or a dull look.
5. Supplying the Solder
Apply a little bit of solder to the hot soldering iron tip on the warm area. This will make sure that the solder flows smoothly from the solder components to PCB for better bonding.
Over-soldering can lead to excessive solder and short circuits so be careful here. This technique also leads to a uniform filet and a neat and rounded joint.
6. Taking Out the Iron
Retrieve the soldering iron intelligently. Make sure to do it when the solder smoothly shifts and makes a round solid joint.
Let the joint cool for some time before you move to the next part. When you remove the soldering iron, it can affect the joint. So be careful throughout this process to avoid any hassle.
7. Reviewing the Joint
The last step is to make sure that every joint is in good condition. Make sure that the surface of the joining is super smooth and does not have any cracks. Because if there are cracks or venting pockets in the solder interface it can be an issue for the circuit.
The cracks on the solder can lead to power compromise or it may also result in short circuits. Make sure all the solder components are withdrawn appropriately. If you are not satisfied with any part of the process, you will have to repeat this all over again. This will, in turn, allow for the determination of the electrical circuit's reliability and performance.
8. Reducing Unnecessary Leads
Wire cutters may be used to remove any extra component leads. You can prevent interference of leads with other solder components by cutting them closer to the PCB.
THT soldering is a reliable technique to assemble electronic components. However, it also has some limitations, such as the size of the components that limit the possibility of using large discrete components.
By following the steps mentioned above you can improve your soldering skills and produce reliable circuits. Remember to use the right tools and practice good techniques. With time and experience, you will become more confident in your soldering abilities. This will lead to successful electronic projects. Happy soldering!
This can be utilized in mechanical reliability, ease of repair, and compatibility. By implementing recommendations in this guide about circuit layout and soldering tips, it is possible to create reliable and durable electronic circuits.

Assembly Enquiry
Instant Quote
Phone contact

+86-755-27218592
In addition, we've prepared a Help Center. We recommend checking it before reaching out, as your question and its answer may already be clearly explained there.
Wechat Support

In addition, we've prepared a Help Center. We recommend checking it before reaching out, as your question and its answer may already be clearly explained there.
WhatsApp Support

In addition, we've prepared a Help Center. We recommend checking it before reaching out, as your question and its answer may already be clearly explained there.
